The Simplicity brand is generally associated with sewing rather than knitting, but their website does include a few knitting patterns. I’ve been trying out different mitten patterns to knit and felt, and this one is my new go-to, minus the suede add on. It has instructions for multiple sizes, and features one of the easiest ever thumb designs. A pleasure to knit away on this basic pattern in front of the tv, during long phone chats with friends, or while listening to an audio book. Hope you find this great pattern as useful as I do.
This morning, the Old Sturbridge Village weekly newsletter contained a quirky article involving, of all things, mitten symbolism. Rather than paraphrase, I’m posting it verbatim.
Slang and figures of speech change over time and from place to place. The phrase “sending someone the mitten” meant to break up with them or to reject a proposal. The Old Sturbridge Village Museum Collection contains an assortment of mittens, including the unique, miniature mitten shown below. As you can see, it measures only 1 ½ inches long! According to the donor, this mitten was sent by Admah Edgecombe of Bethel, ME to her fiancé, Charles Poole of Woburn, MA to break off their engagement. Despite this, they later married in 1857 and had three children. Whether or not this story is true, the mitten demonstrates incredible knitting technique, especially in the thumb gusset construction.
I’ve been knitting and felting many pairs of mittens this winter. What have you been working on?
Last winter, I knitted, felted and sold about 20 pairs of felted mittens at pre-holiday craft fairs. I don’t mind making socks on circular needles, but not mittens – guess the hole for the thumb bothers me, I dunno. Anyway, I use the 2-needle pattern below, but I make the mittens much larger than if they weren’t about to be felted. That means, for a child, I make a small adult size. For men, the bigger medium or largest size. You have to use your judgement and know your yarn. Use your judgment for women. For felting, I’ve found that Paton’s 100% wool worsted weight gives me predictable results. It is readily available, inexpensive, knits up beautifully, and comes in many lovely solids and blends. Yarns made specifically for felting shrink too much for this application.
Traditional two needle mittens work up quickly, and suit everyone from child to adult. Use up your yarn stash and knit a pair of mittens in a different color for everyone in the family.
Sizes: small child, medium child, large child, adult
Cuff: With smaller needles, loosely cast on 24(28-32-36)sts. Work *K1, P1,* ribbing until piece measures 2 1/2 (3 1/2, 4, 4 1/2)”. Change to larger needle.
Hand: Row 1 (right side): K2, inc in next st, K to last 3 sts inc in next st, K1. Row 2 Purl. Continue working in SS until piece measures 1″ (1 1/4, 1 1/2, 2″) from end of ribbing, ending with a P row. For the last 3 sizes only Work 2 more rows. (SS)
Thumb Gusset: Row 1: K12 (12-14-16-18), place marker on needle; inc in each of next 2 sts, place marker on needle: K12 (14-16-18) sts. Row 2: and all even rows Purl. Row 3: K to marker, sl marker, inc in next st; K to st before next marker, inc in next st, sl marker, K to end. Repeat Rows2 and 3 until there are 8 (10-12-14) sts between the markers; end by working Row 2.
Divide for Thumb: K12 (14-16-18), drop marker; K8 (10-12-14)sts for thumb, and then place thumb sts on holder; K 12 (14-16-18) Work even in SS until work measures 4″ (5 1/2 -6-7″) from start of Hand, ending by working a purl row.
needle, run needle through remaining sts. Slip sts off needle, pull yarn up tightly and fasten securely. leave yarn for sewing.
Thumb: Sl sts from holder to needle, purl one row. Work even in SS until thumb measures 1 1/4 ( 1 3/4-2-2 1/4″) ending with a purl row. Next Row: K2 tog, rep across row cut yarn leaving 12″ end finished the same as above. Fold mitten and sew seams.
Your mittens will be comically large and floppy. That’s OK, that’s what you want. Follow your best felting instructions until they shrink to size. I’ve been known to throw wet mittens in the dryer, medium setting, to get to where I want them.
Good luck, happy knitting , let me know how you do!
This pattern features an unusual 2 piece construction, knitting separate fronts and backs. I don’t see why it couldn’t be used to make cold weather mittens as well as oven mitts. Makes for good, useful gifts!
Good question. What are buff mittens? I’ve never heard of them before, but today, Knitting Daily e-newsletter featured an article from PieceWork magazine that was published in Fall 2011. The following is quoted from that article, “Annis Holmes’s Buff Knitting: Preserving and Updating a North Country Tradition.” The North Country cited includes New England, which increased my interest, being a lifelong native of the region.
According to author Joanna Johnson, “In winter during the late nineteenth and early twentieth centuries, warm, windproof, and waterproof mittens, deemed ‘buff mittens,’ were a mainstay for loggers and others laboring in the woods of the Adirondack region of New York, New England, and neighboring Canada….The term ‘buff’ may refer to the felted pile or to the undyed yarn that typically was used to make the mittens.”
Curious about the term “buff”, I checked it out in several dictionaries, but none of the definitions I found relate to mittens or even to knitting. Instead, a soft, thick leather with a napped surface, often made from buffalo skin, was known as buff. Then there were the more common meanings, such as a brownish yellow color, a polishing process, bare skin, a devotee of some particular subject or activity, or the slang for physically fit. Interestingly, American colonists in the 17th century wore a short, thick coat made of buffalo leather, called a buffcoat.
But back to the mittens. For PieceWork’s 10th annual Historical Knitting Issue, available now, Joanna designed the child’s buff mittens seen in the photo. If you want to know how that soft fuzzy surface is made, you can order a kit, or read about it in the magazine. Basically, it involves knitting the fabric with loops on the surface, then cutting, trimming, and fulling the finished product. Sounds like the embroidery technique of Turkey work, aka Ghiordes Knot, for which there are numerous tutorials online.
More info about this project, including where to get the mitten kit, is available right over here .
(Wonder how these mittens hold up after multiple washings and wearings. They recall to mind some dusting mitts my mother used to have.)
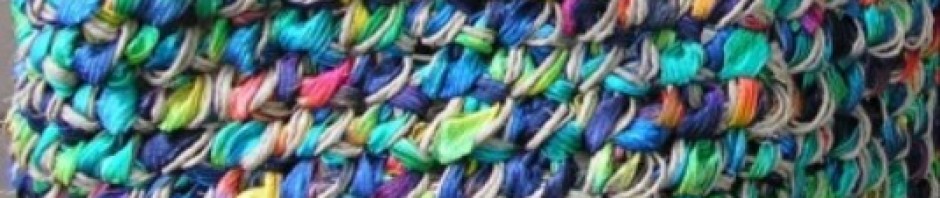
From issue 222 of the Classic Elite Yarns e-newsletter. A stitch pattern that’s clever and pretty, but not complicated. I like that it doesn’t add the bulk of a cable pattern. And this yarn comes in lovely colors. Onto the TBK list! Pattern here.
There’s a new presence on the knitting web, Rosie’s Yarn Cellar, located in Philadelphia. (Website: http://www.rosiesyarncellar.com/) This past month, they’ve posted several cool patterns, and today I came across this cool mittens pattern, knitted from side to side, and shaped using short rows. Designed by Lisa R. Myers, and named “Burt’s Mittens, this looks like it’d be lots of fun to try out. I love all the innovations that have been coming out these last couple of years. Anyway, here’s the link to download the pattern.


 # Materials: #5 and #7 needles
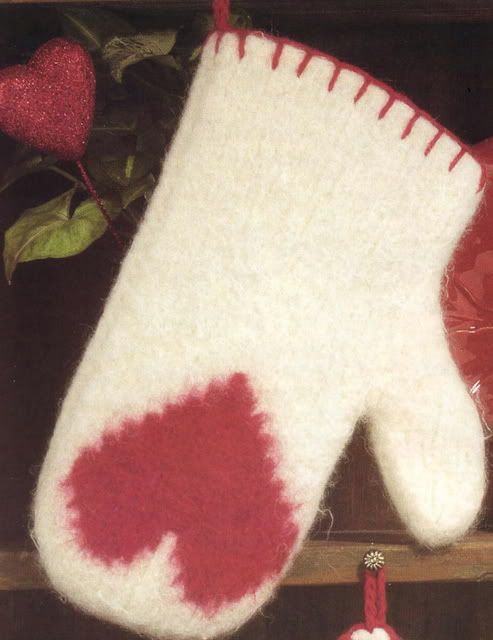


 From issue 222 of the Classic Elite Yarns e-newsletter. A stitch pattern that’s clever and pretty, but not complicated. I like that it doesn’t add the bulk of a cable pattern. And this yarn comes in lovely colors. Onto the TBK list!
  There’s a new presence on the knitting web, Rosie’s Yarn Cellar, located in Philadelphia. (Website:
